Transmitter (Version 2)
Your transmitter finds the latest release itself: Transmitter → Transmitter updates.
A free, open-source radio control system you can build yourself
Keep your transmitter and receiver up to date. Find answers to common problems. Read every help page from the transmitter.
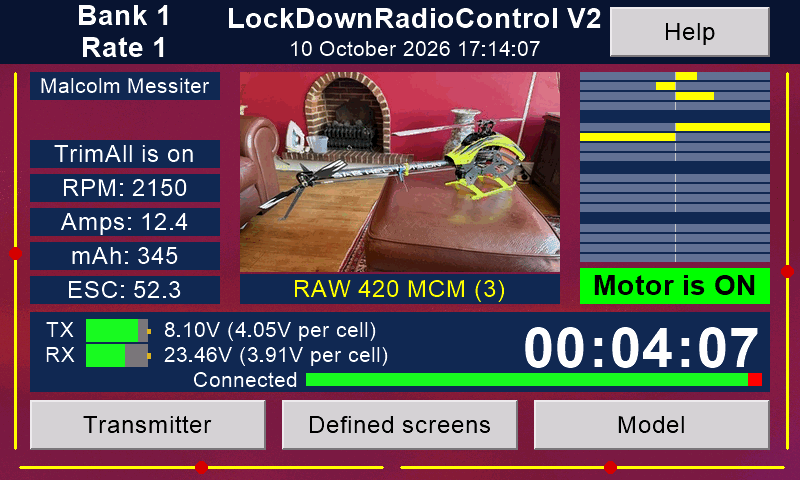
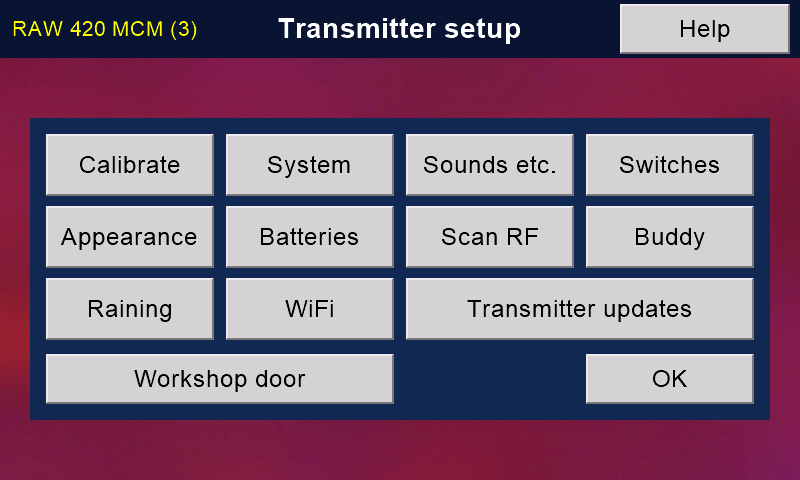
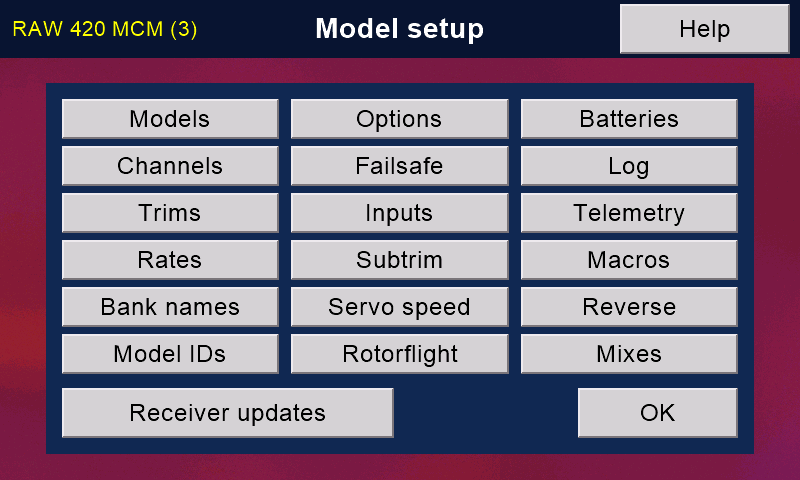
On the front screen, Transmitter opens Transmitter setup and Model opens Model setup. So Transmitter → WiFi means: press Transmitter, then WiFi.
These are read live from messiter.com: the same place your transmitter and receiver look for updates.
Your transmitter finds the latest release itself: Transmitter → Transmitter updates.
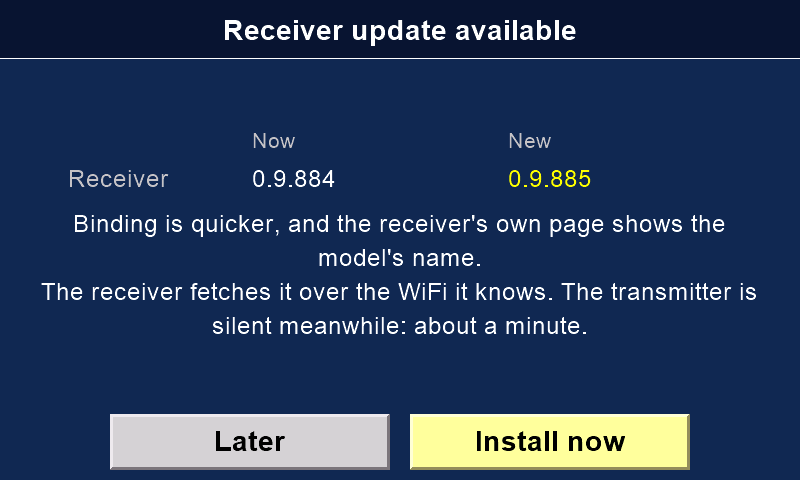
Your receiver finds the latest release itself: from the transmitter, or from the phone app.
iPhone and iPad: from the App Store. It updates like any other app.
Android: from messiter.com. The app offers each new version itself.
The app is free, with no adverts and no account.
The Version 2 transmitter updates itself over WiFi. One button brings it all up to date: the screen, the main board (the Teensy) and the help texts.
Nothing happens by itself. You choose when.
Press Transmitter → WiFi.
Touch your network. Type its password on the screen's keyboard. The transmitter remembers up to eight networks.
At the field, your phone's hotspot will do.
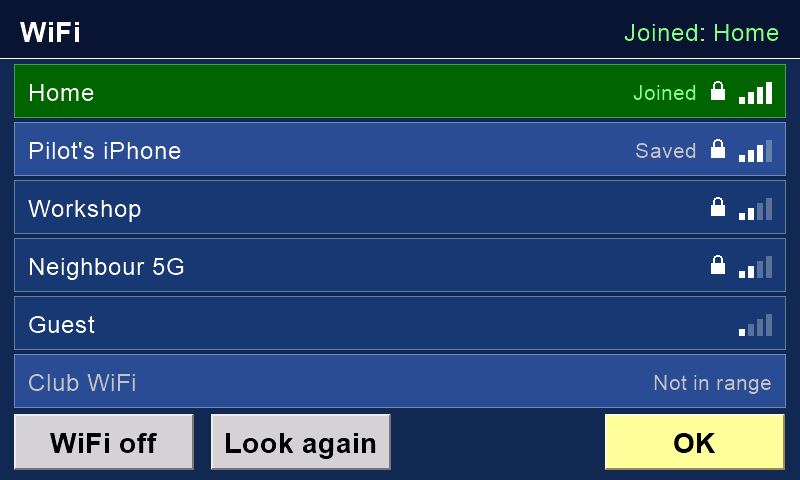
Check: the WiFi page says Joined at the top right.
Updates never run while a model is connected. Switch the model off and wait a minute.
Put the safety on. (With no safety switch: switch the motor off.)
Check: press Transmitter. The Transmitter updates button is not grey.
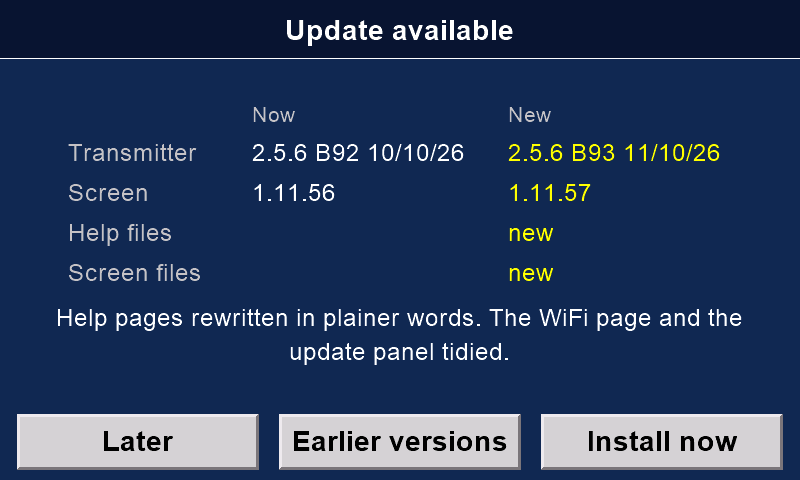
Press Transmitter → Transmitter updates. The transmitter asks messiter.com for the latest version.
It shows the version you have now, the new one, and what changed.
Already up to date? Then there is nothing to do. Press OK.
A few minutes
First everything is fetched and checked. Until then, Cancel changes nothing.
Then your models, settings and logs are copied to the screen's memory card. If they cannot be copied, nothing is installed.
Then the screen says Do not switch off. Leave it alone. The main board is updated first, then the screen's files, then the screen's own firmware. The screen restarts at the end.

Green, Update complete: it shows both versions and how many of your files were copied first. It also says that the new firmware reads your models' settings exactly as the old one did.
Red, Update failed: it says where it stopped, why, and what state things are in.
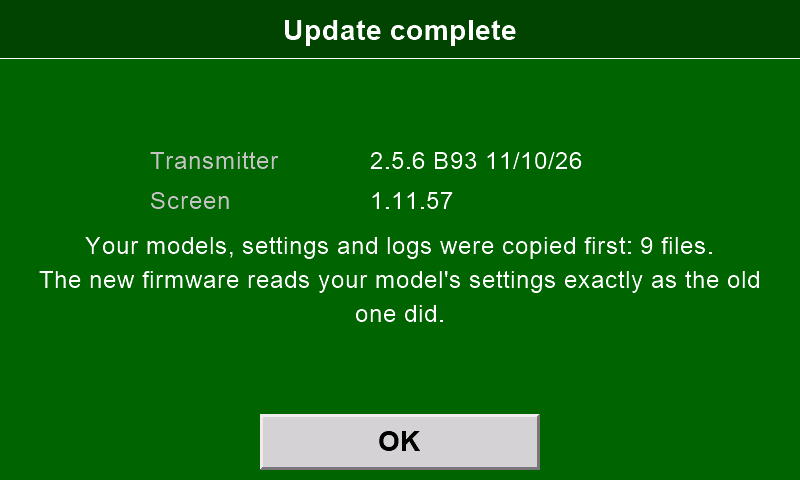
Check: the panel is green. Press OK.
How updates keep you safe
Safety: DO NOT FLY
If the update panel ever says DO NOT FLY, do not fly. It means the old firmware could not be put back. Write to Malcolm with a photo of the screen.
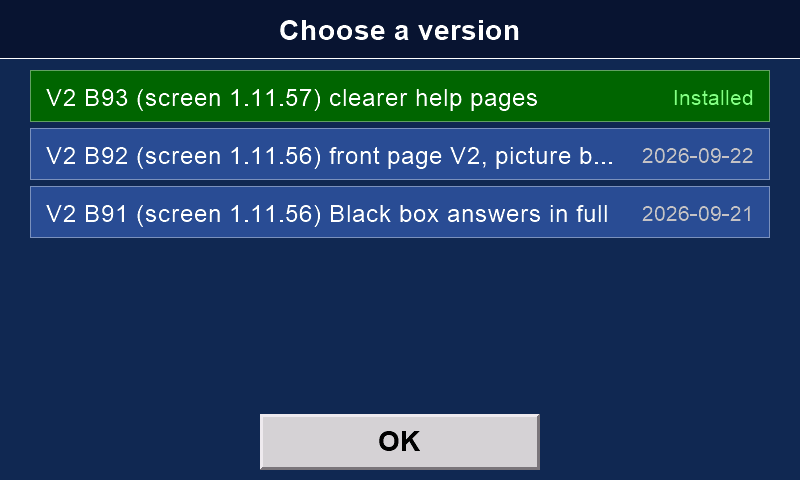
On the update panel, press Earlier versions. You see the latest release and up to three before it. The one you have is marked.
Touch one to see what would change. Install now puts it back in the same careful way: your files are copied first, and the firmware goes on trial.
Afterwards, Transmitter → Transmitter updates offers the latest version again.
A brand-new screen needs its firmware put on once, by USB cable. Put a blank microSD card in it first. Build one shows how.
Then give it WiFi. It downloads its pages, pictures and sounds by itself: about 43 MB, in about seven minutes.
Tip: from Version 1 to Version 2
A Version 1 transmitter can become a Version 2.
Keep the main board, sticks, switches and your models. Print the Version 2 case front for the new screen, fit the screen, and update the firmware. Build one shows how.
Version 2 receivers and dongles update over the air. Your settings, binding, flight records and backups are kept.
There are three ways. Choose the one that suits you.
You need:
Then:
No password ever travels over the air. The receiver uses the WiFi it already knows.
Tip: WiFi for the receiver
Give the receiver a WiFi network once, in the phone app: Setup → WiFi settings. At the field, your phone's hotspot will do.
A failed install leaves the old firmware in place. There is nothing to undo. A dongle updates the same way.
Use this for a brand-new board, or to start a board again from nothing. It needs Chrome, Edge or Opera on a computer. Phones and tablets cannot do it.
Warning
The browser way erases the board first. Its settings, binding and records are lost. For a board that works, use the transmitter or the phone app instead.
Compare them with the latest versions at the top of this page.
Touch a question to see its answer.
Put the safety on, then press Transmitter → Transmitter updates again.
WiFi and Bluetooth switch themselves off whenever the model could be flying. With the safety off, they are off.
That is normal. The screen restarts to start its new firmware.
Wait for the green or red panel. If the new firmware does not start properly, the previous one comes back by itself.
The new firmware would have read one of your models' settings differently, so it was not kept. Your transmitter is as it was before.
Please tell Malcolm what the screen said.
The transmitter was switched off part way through. Press Transmitter → Transmitter updates again.
Your files were copied before anything was changed.
Nothing. No update writes or deletes your models, settings or logs.
A copy goes to the screen's memory card first, just in case. The newest twelve copies are kept. There is no button on the screen to put a copy back yet: if you ever need one, write to Malcolm.
Yes. On the update panel, press Earlier versions. How to go back.
That is on purpose. They switch off whenever the model could be flying: while the safety is off. (With no safety switch: while the motor is on.)
Put the safety on, and they come back.
Close the phone app on every phone and tablet. A receiver takes one Bluetooth connection at a time.
The receiver must be a Version 2 (firmware 0.9.874 or later), switched on and within reach.
It lets workshop tools on a computer reach the screen over WiFi. You never need it to fly or to update.
Shut, the screen answers nothing but its status. So it is safe on a club's WiFi.
To open or shut it: Transmitter → Workshop door. It opens on the network you are joined to, and only that one.
Check that the receiver has power, and stand within a few metres. Make sure Bluetooth is on in your phone's settings.
The app tells you when the signal is too weak to connect reliably.
Another phone or tablet probably holds it. A receiver serves one at a time. Close the app on the other device, then try again.
The flight controller may be asleep, or its lead unplugged. Switch the model off and on. Check the lead into the flight controller.
The receiver's firmware is too old to be updated from the transmitter. Update it once with the phone app. After that, the transmitter can do it.
A failed install leaves the old firmware in place.
Wait five minutes: a slow install is not a failed one.
Still nothing? Its WiFi password is probably wrong. From a computer, join the receiver's own network (named after your model) and open 192.168.4.1 in a browser to put it right.
In-flight adjustments, the command line, Diff to card and Execute diff need a USB-C data cable from the receiver to the flight controller, as well as the usual lead.
No. The Rotorflight pages on the Version 2 transmitter need a Version 2 receiver: they use its Bluetooth.
With automatic model selection (AMS) on, the transmitter asks whether to store the model's ID. Cancel stores nothing, and the model does not connect.
Store each model's ID: Model → Model IDs. Help for Model IDs.
V2 B92 and older say "Motor switch is still ON!". Later updates say "The motor switch is ON."
The motor switch was on when you switched on, or when the link was lost. Nothing is sent to the model until you switch the motor off and press OK.
With a model connected, hold the power button down while the countdown runs. This guards against a knock in flight.
This website has the newest help texts. They are written for the transmitter update after V2 B92.
On V2 B92 or older, some help pages have older words, and a few buttons have older names.
Once that update is out, press Transmitter → Transmitter updates. It brings these words to your transmitter.
Every page on the Version 2 transmitter has a Help button. Its text explains that page in plain words.
Here are those texts in their newest words, to read on a phone or a computer. You can search them all.
They are written for the transmitter update after V2 B92. A transmitter on B92 or older shows older words.


Write to Malcolm: mmessiter@gmail.com. He reads everything and answers.
It helps a lot if you say:
Tip: send debug data
In the phone app, the receiver's Event log has a button: Send debug data to Malcolm. It makes one text file: the board's version, how its last update went, and what it has been doing. It holds no passwords. Press it straight after something goes wrong.