Model setup
The help for this page of the Version 2 transmitter, in its newest words. A transmitter on V2 B92 or older shows older words.
On the transmitter: Model setup
Every setting of the model in use starts here.
The transmitter's own settings are on 'Transmitter setup'.
'OK' goes back to the Front screen.
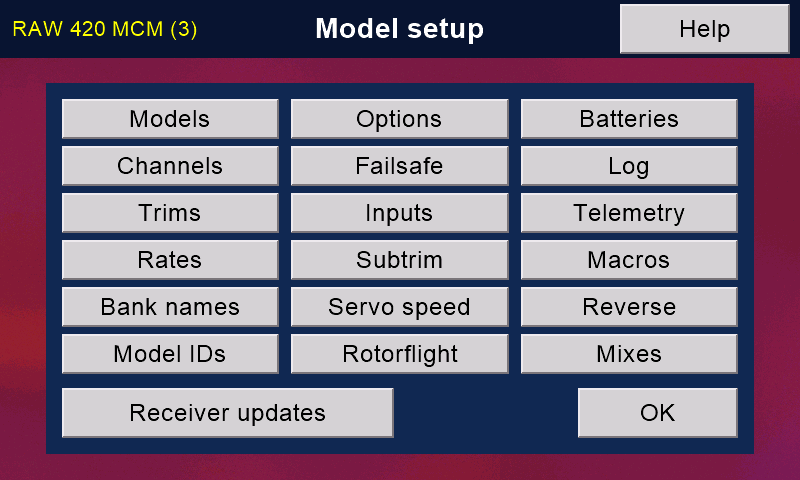
Where to find things
'Options': trims, motor switch, timer, warnings and picture.
'Channels': watch each channel move, and edit its curves.
'Inputs': what moves each channel, its name and its output.
'Servo speed': slow a servo down (flaps, undercarriage).
'Bank names': a name for each of the four banks.
'Model IDs': store the ID of this model's receiver.
'Rotorflight': the flight controller's settings.
Receiver updates
'Receiver updates' checks messiter.com for receiver firmware.
Nothing is installed until you press 'Install now'.
It needs the model switched on and connected.
(Until then the button is grey.)
The safety must be on.
(With no safety switch, the motor must be off.)
It works with a Version 2 receiver only.
The transmitter needs its own WiFi for the check:
'Transmitter setup', 'WiFi'.
On 'Install now' it sends the order by radio, then goes silent for about a minute.
Meanwhile the receiver fetches the update over the WiFi it knows, installs it and restarts.
Keep the model switched on, and the safety on.
At the field, give the receiver your phone's hotspot once, on the phone app's 'WiFi settings' page.
Still stuck?
See common questions, or write to mmessiter@gmail.com. Say which page, and what the screen showed.